
It is becoming more common for businesses to want to operate a separate balance sheet for divisions or to combine legal reporting entities into one database for ease of processing.
In order to achieve this, you need some form of “intercompany” within a single database. Dynamics GP offers two options to make this possible:
- Control Account Management
- Interfund Management
Control Account Management
This option allows for posting for both Accounts Payable and Accounts Receivable balances. Initial transactions are posted to a global control account and then a process can be run at month end to give the intercompany balance based on unpaid transactions and the division they posted to.
Points to note:
- This relys on “live” posting – i.e. it looks at all transactions at a point in time – so in order for it to be effective, you need to complete processing for one month before moving on to the next.
- You can choose to report or post the result.
- The calculation is based on the expense or income code on the transaction.
- Better suited where it is for informational purposes rather than legal entity reporting.
To set up Control Account Management, go to Microsoft Dynamics GP --> Tools --> Setup --> Financial --> Control Account Management.
Select which Segment of your chart of accounts defines the business unit and tick the box to activate:
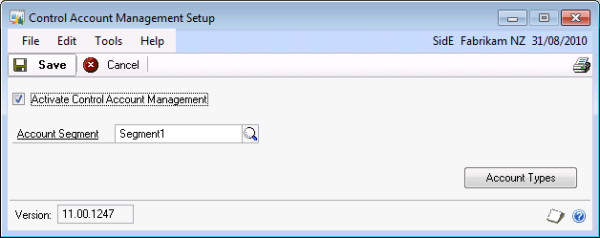
Click into the Account Types button to set up either or both Accounts Payable and Accounts Receivable:
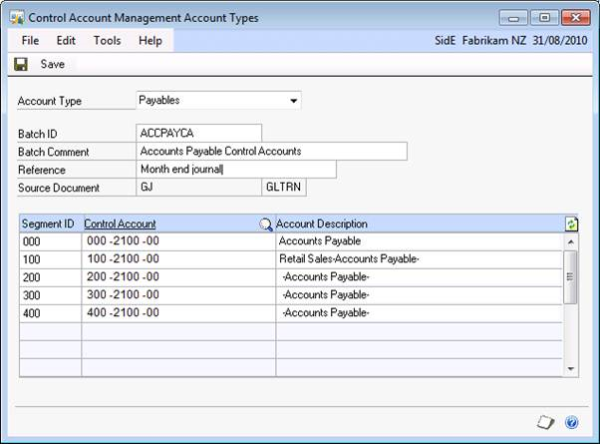
The Control Account you select must have the business unit segment (i.e. the segment you chose earlier) as matching. For example, you can’t select Segment ID 100 to go to Control Account 200-2100-00.
If you don’t want a particular business unit to have its own control account, leave it blank and no journal will be produced related to this segment.
For day to day processing, all transactions continue to post to the main accounts payable control account. This means you don’t have to worry about whether a transaction has posted to the correct place. At month end, simply run the system query to get the sum of all unpaid amounts that relate to each business unit. This can then be posted as a reversing journal:
Transactions --> Financial --> Control Account Management
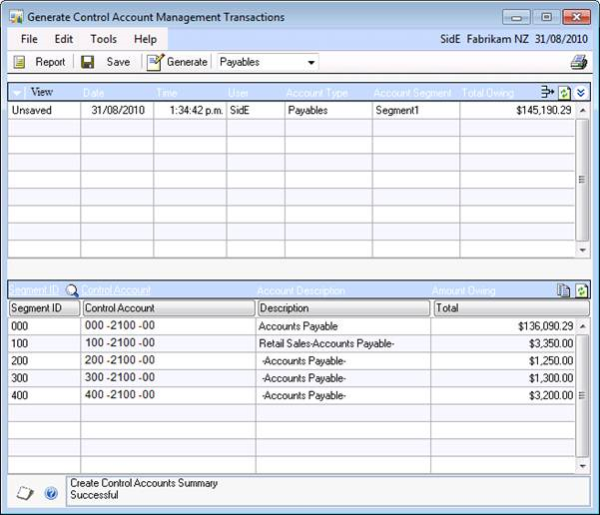
Click the Generate button to post the journal.
Interfund Management
This is the better option for operating multiple legal entities in a single database. Effectively it treats every transaction as a possible “intercompany” transaction. The segment chosen (department, company etc) to identify the interfund determines the posting.
If on any single transaction (from anywhere in the database) there are different interfund segments, the interfund transactions are added automatically at the GL posting stage.
It works on the basis of a “central treasury” – i.e. each entity has a single Interfund account that relates to the money owed to all other entites. Unlikely pure intercompany, you don’t get the breakdown of A owes B, A owes C, A owes D etc. In most cases, this is not needed.
Points to note:
- It is best to know this requirement up front when setting up a database – fix ups can be messy.
- This assumes each entity has its own entire balance sheet.
- In order to balance the AR and AP Aged Trial Balances to the GL, it is best to have each Customer or Supplier “owned” by a single entity – e.g. the control account is determined by the main entity.
- Plan to use this (it may be best to talk to your favourite consultant first).
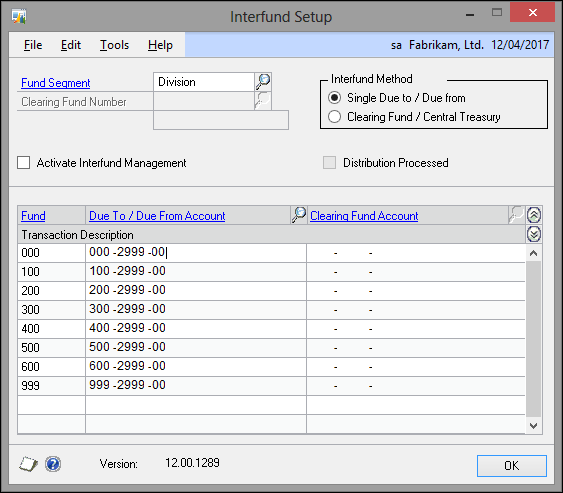
To set up Interfund Management, go to Tools --> Setup --> Financial --> Interfund Management.
Choose the Fund segment.
Choose the Interfund method.
Note: I have only used Single Due To / Due from so this article is only based on that option – it seems simpler to follow.
Select the account to be used for each Fund segment.
Once everything is set up, choose to activate.
Note: you can save the screen with all the setup without activating. You can turn Interfund on and off if needed – most likely during initial implementation or if setting up after implementation to “tidy up”.
Once activated, this is the journal output if a transaction with different Fund segments is created (the same applies for Accounts Payable etc).
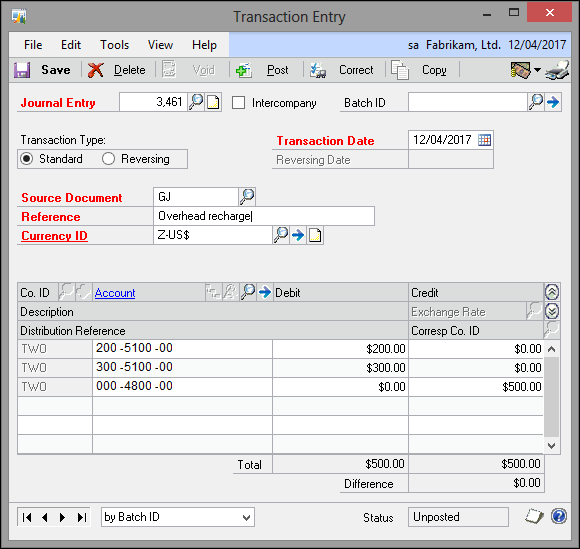
The resulting journal entry shows as follows:
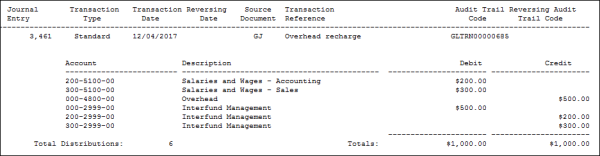
Enquiry back on the journal number will show the interfund transactions.
I have set this up at two sites that I work with now and it works fantastically.
Contact us today, to chat about how Olympic can help with your digital transformation.
